Welcome to my blog. I am going to show you how to make 3D snowflakes using the Explore. Now you can do this with any machine or even without the machine. I will add notes throughout to explain how to do this without a machine.
Lets get started.
Open up Design Space. Now you can do this with any snowflake, but I used a dingbat font from dafont.com

If you are using a font, open the text box, type the letter, I used the G snowflake. Change the font to snowflake. To make this easier, you can type in the font name and it will pull up. Change the font size to 5 inches. If you choose to use a cricut image, you would choose insert image and select which image you choose to use. Recommendation: the snowflake I used is very delicate, I would recommend using a snowflake with a solid outline. (If you are using another machine you would choose the image and cut, or cut out a snowflake on your own.)

Next you will need to add score lines. Search for score line in images and it will pull up what you need. (Doesn't apply to anything outside of Design Space)

Add you score lines. The black lines is where you will add the score lines, plus the vertical line shown. There will be four total gong across the snowflake. (If you are not using Design Space, you will add the score lines by yourself. Use a score board to make this easier. Skip the next 3 images)

Make sure to select all and hit attach. Hit the GO button.

Make sure everything is on one mat. If it is not, go back and attach. Here you can have it do two snowflakes. I tried to do 4, but it crashed on me. But you can try.
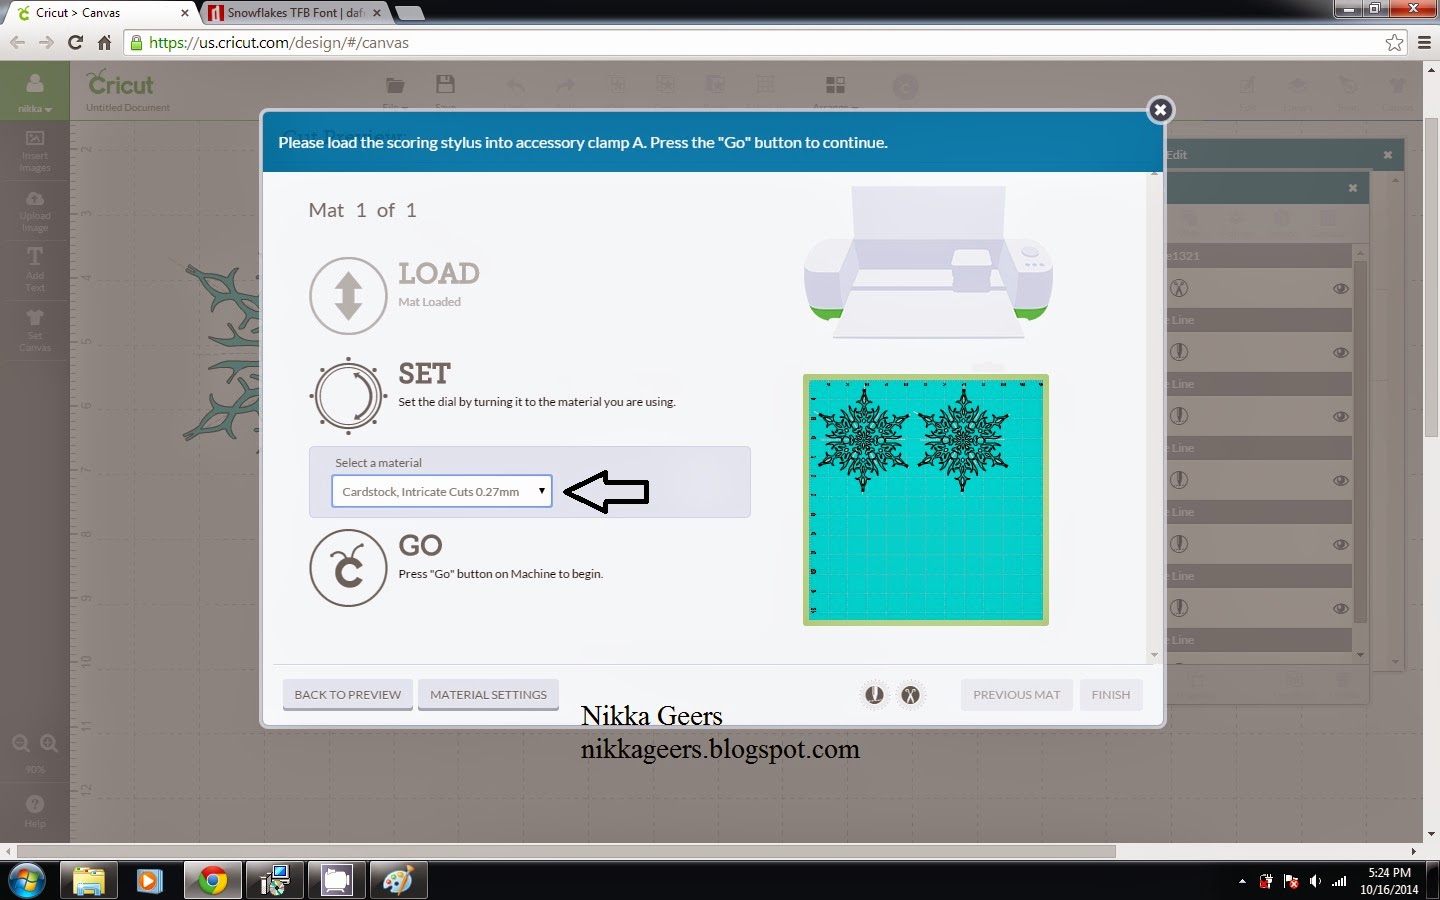
Change your dial to custom and choose Cardstock, Intricate Cuts.
The rest id directions for all the snowflakes.

These are the cuts after they are cut.


Now fold on the score lines. The easiest way to do this is fold all the mountain folds, then fold it over and do all the valley folds.


Place the two snowflakes on top of each other. Glue just the tips of the valley fold. This is where it becomes difficult when its lacy like this. You have such a small area to glue. Do not glue the whole valley fold, it will not pop up if you do this
This is the completed snowflake. Below is the side view to show the dimension.

This is the first snowflake I made. Again very delicate and difficult to glue. But very pretty.

I used Frosted paper packet from Close to My Heart. This paper is retired but our current paper pack Yuletide Carol - X7187B or Snowhaven X7188B would work perfectly. I also used Liquid Glass Z697 to glue the snowflake together.
You can shop for these items at nikkageers.ctmh.com
Check out my facebook page https://www.facebook.com/Nikkageersctmh
Thank you for coming to see this tutorial. To check out other tutorials, visit {here}
To make sure you don't miss out on any new tutorials, artwork or members only specials, as it is easy to miss posts on Facebook and I don't post to all of them, join my {Facebook group}
Wow, thank you! This tutorial was excellent! I will be making this hopefully soon. I wish there was a share button to this so I could share it to my page on Facebook. Then I could find it when I want to. Thank you again for this wonderful tutorial! It was step-by-step so I could understand it. Thank you!
ReplyDelete